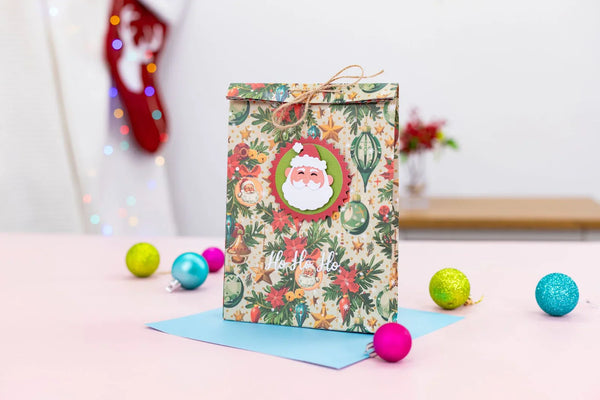
Sara Signature Glamour Box
- Read time: 5 minutes
- Written by: CraftersCompanion
Hi Crafter’s,
Did you catch Sara’s ODS shows for her brand NEW Signature Collection- Glamour? You might have seen this fabulous project by Marie.
We just had to find out how she made it!
Products you’ll need to recreate this project
Steps to create this box using the Sara Davies Signature Glamour collection
- Cut three pieces of A4 card 11½” long. On each piece mark 2 1/8” from the corners along each edge. Trim the corners off. Glue two of the pieces together and put to one side.
Back Panels
- Cut one piece of card 7¼” x 8¼” Score at 3/8” using the box lid side of the board along the shorter side. Next cut two pieces of card 3 3/8” x 8¼” Score at 3/8” on one long side and one short side. Then cut away where the score lines cross.
- Attach the back panels to the base piece which is two layers of card (from step 1) and join the two smaller side panels to the larger back panel with the tabs.
- Cut card pieces as follows. One piece 7 ¼” x 8 ¼”, two pieces 3” x 8 ¼” and two pieces 4” x 8 ¼” Score at 3/8” using the box lid side of the board on each piece along the shorter edges. Attach each piece to the box base using the tabs. Adhere the third base shape from step 1 to cover the tabs. Line the inside of all the side panels with Centura Pearl card.
Box Lid
- Cut A3 card 14 7/8” x 11 5/8” Working on the back of the card, mark pencil lines on all edges at 1 5/8” At each corner mark a point 2 1/8” along the lines. Join these points together across the corners. Next draw a line 1 5/8” parallel to the corner line.
- Draw 90˚ lines from each intersection. Cut the lines on the longer edges and leave tabs on the shorter edges (corners)
- Score along the 1 5/8” lines and the tab lines. Burnish the score lines and glue the tabs to make the lid.
Draws and Slip Covers
- Front Draw. Cut card 8 ½” x 9 ¾” Score at 1” using box base side of board on all four sides. Trim tabs at the corners, burnish the score lines and glue the tabs. For the slip cover cut card 15 ¼” x 7 ¾” Using the box lid side of the board score at 1 1/8” and 7 3/8”. Fold the last score line up against the edge of the board and score again at 1 1/8” and 7 3/8” Burnish all score lines and glue to make the cover. Attach the slip cover to inside of box and add draw.
- Side Draws – make two. Cut card 5 ½” x 9 ¾” Score at 1” using box base side of board on all four sides. Trim tabs at the corners, burnish the score lines and glue the tabs. For the slip cover cut card 10” x 7 ¾” Using the box lid side of the board score at 1 1/8” and 4 ¾” Fold the last score line up against the edge of the board and score again at 1 1/8” and 4 ¾” Burnish all score lines and glue to make the cover. Attach the slip covers to inside of box and add draws.
- Diagonal Corner Draws – make two. Cut card 3 ¾” x 9 ¾” Score at 5/8” using box base side of board on all four sides. Trim tabs at the corners, burnish the score lines and glue the tabs. For the slip cover cut card 7 ¼” x 7 ¾” Using the box lid side of the board score at ¾” and 3 3/8” Fold the last score line up against the edge of the board and score again at ¾” and 3 3/8” Burnish all score lines and glue to make the cover. Attach the slip covers to inside of box and add draws.
Inner Box
- Cut card 14 ½” x 11 ½” Score at 4” using the box lid side of the board on all four sides. Cut tabs on each side and glue to make box. Attach to box base.
- Cut card 7 ½” x 10 ½” Score at 2” using box base side of the board on all four sides. Cut tabs and glue to make a box. Then cut strips of card 2” wide and use to create compartments within the box.
- Cut card 7 ¼” x 10 ¼” Score at 1 7/8” using box base side of the board on all four sides. Cut tabs and glue to make a box. Then cut strips of card 1 7/8” wide and use to create compartments within the box.
- To make a lid for the inner box cut card 8 ¾” x 5 5/8” Score at 1” using the box lid side of the board on all four sides. Cut tabs and glue to make the box lid.
Decorate the Inside and Outside of the box using the items from the Glamour Collection – Have Fun!!
We hope you enjoy recreating Marie’s project! If you haven’t picked up the Glamour collection yet, the full range is available now here.
Happy Crafting,
CCUK
xxx