Craft a butterfly shaped card
- Read time: 3 minutes
- Written by: Crafter's Companion
Now that spring has sprung, summer is in full force and the wildflowers are raging, butterflies are everywhere leaving fluttering trails of loveliness as they go.
Why not create your own sparkling folded butterfly card to remind you of your favourite times this summer?
Follow our guide below to get started!
You will need:
White cardstock measuring 15″ x 5.5″
White cardstock measuring 6 x 6”
Craft Tape
3pc Adhesive Glitter Cardstock measuring 8 x 5” (we’ve used gold, purple and blue)

Creating your card
-
Remove the metal dies and instructions from your Majetstic Butterfly pack.
2. Take your sheet of 15″ x 5.5″ white cardstock and place this onto your scoreboard.
3. Following the included instructions, score your white card at 2.5” and 5” then at 10” and 12.5” so you have four scored lines. (If you’re using a different multi media die set, please follow the instructions included, as it may have different measurements).
4. Fold and burnish your card on the scored lines so that you have a gatefold card that closes perfectly.
5. Take the butterfly outline die, and place this onto the front of your folded card, sticking it into place with craft tape. Pass this through your Gemini Die Cutting Machine so you are left with a beautiful butterfly-shaped gatefold card.
6. Grab your other piece of white cardstock measuring 6 x 6” and repeat the above process, so you have another die-cut butterfly.
7. Take your gold sheet of glitter cardstock and place onto it the outline die, the main butterfly die and the smaller antenna die, securing into place with tape.
8. Pass this through your die-cutting machine and pick out each bit using your pokey tool.
9. Repeat this step with your purple glitter cardstock so you have both colours cut as full butterflies and the wing pieces too.
10. Peel the adhesive backing from your gold die-cut butterfly and stick this to your second white card piece so it fits perfectly in place.
11. Take the small purple wing pieces and remove the backing, sticking them inside the gold butterfly wings. These are cut to the size of the butterfly so will fit perfectly inside each missing wing part. Leave some parts blank so we can fill these with the blue card!
12. Take the blue glitter card and the main butterfly die. Pass this through your die-cutting machine so you’re left with a blue butterfly and the pieces from its wings.
13. Fill in the missing wing pieces of your main butterfly with these so you have a combination of a main gold butterfly with purple and blue wings.
14. Take your scissors and cut your butterfly straight down the middle. With your tape pen and your original folding card piece, cover the front in the glue and stick both butterfly pieces on each side accordingly.
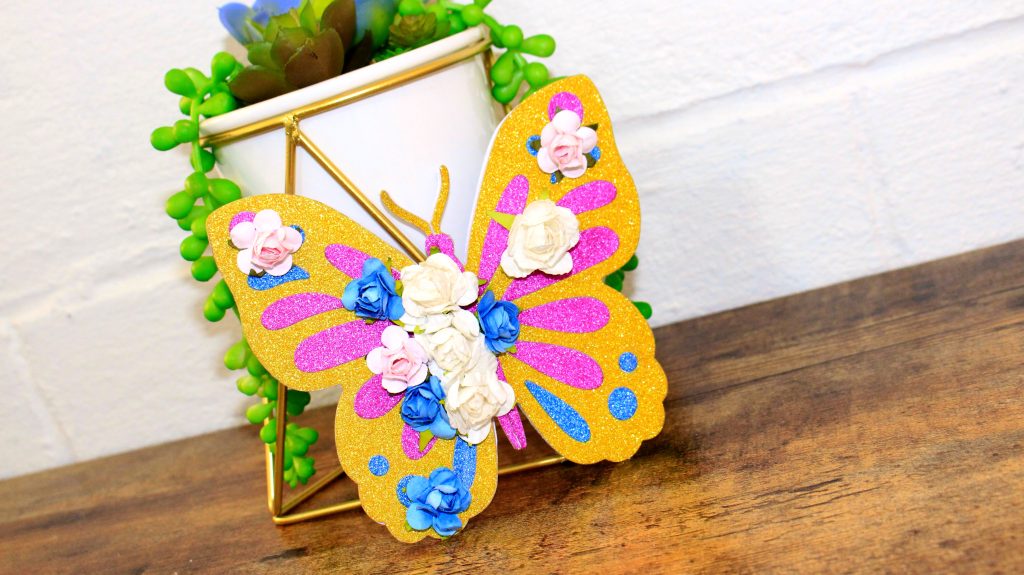
Your beautiful folding butterfly card is now complete! Add embellishments of your choice or leave it as a plain glistening glitter card to show some sparkle!
Share your crafty projects with us on Social Media! Post with the hashtag #crafterscompanion and follow us on Facebook UK, Facebook USA, Instagram UK and Instagram US.
