What is matting and layering?
- Read time: 3 minutes
- Written by: Crafter's Companion
If you’re a bit of a beginner to papercrafts, you may have heard a few words or phrases that have made you think, “what on Earth does that mean?” We’ve all been there, but whether you’re new to the craft or an expert, it’s always great to have a refresh and possibly learn something new.
Today, we’re talking about matting and layering, which is a phrase that often leaves people scratching their heads, but the chances are that you use this technique in all your papercraft projects!
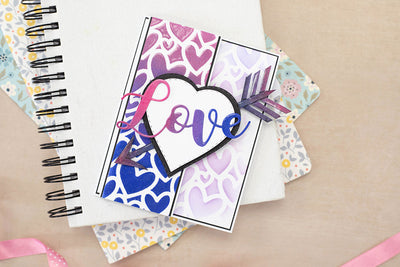
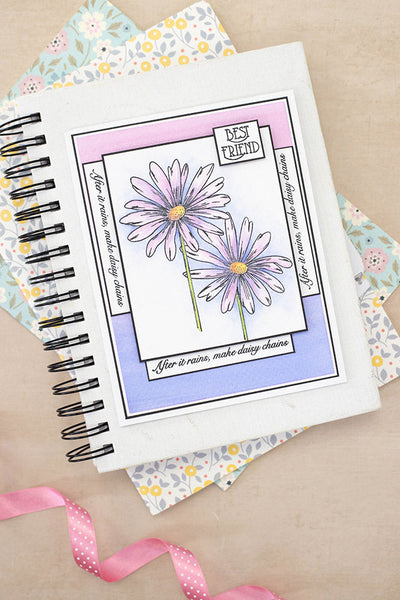
To put it simply, matting and layering is building up paper or card as a background for an image or embellishment. As you build up the layers, the size of the paper or card gets slightly bigger to create a raised “step” effect and a focal point that’s pleasing to the eye.

How to mat and layer
The best bit about this technique is that it’s so simple to achieve! Start by choosing the focal point for your papercraft project. This could be a decoupage image, something the you have created with stamps or dies, or a pre-printed image. Then choose some complementary card or paper to sit your chosen image on.
Now for the ‘matting’ part of the process. Select some card or paper to layer the image on top of. Choose something that contrasts with the base that the image is sitting on, so a bold colour, glitter or a textured material will work really well!
Cut this mat out slightly larger (about 0.25” on each side) than the image, so that a frame is created and stick them together with your choice of adhesive. Use glue tape for a flat mat, foam pads for a 3D effect or wet glue if you’re worried that you’ll need to adjust the positioning of your layers.
Continue these steps until you’ve framed the focal point to your liking, then apply it to your card, scrapbook, gift tag – whatever papercraft project you’re creating!

Make it your own
Whilst matting and layering is a really easy technique, there are several ways that you can spice it up to make your projects even more unique.
- Try layering patterned paper or card – stripes, spots and flowers (oh my!) will look brilliant when used as backing. Try clashing patterns for a modern look.
- Use fancy edged scissors to cut out your matting – for a showstopping focal point, use scissors with a shaped blade, like scallop-edged or waves.
- Layer the paper or card on an angle – set each layer of card or paper at a jaunty angle for an unusual and abstract look.
- Add some embellishments – go crazy with gemstones, ribbons, feathers, pearls or any other embellishments that you like!
- Emboss your layers – while you can’t see each layer fully, adding some embossing around the edges will add a fun, raised look to the project and provide an even more exciting focal point.
We hope we’ve de-mystified matting and layering for you, and we can’t wait to see how you use it in your papercraft projects! Make sure you tag us on social media on Facebook, Twitter or Instagram using the hashtag #crafterscompanion.