The Beginner’s Guide to Box Making
- Read time: 11 minutes
- Written by: Crafter's Companion
The act of gift giving is always special, carefully considering your recipient, taking time to choose the perfect gift or little treat to brighten their day, wrapping it up and finally handing it over. Each moment is imbued with thought and care, so why not give even more with your gifting with a beautiful handmade gift box?
Box making may seem tricky, but that’s where we come in! This blog will take you step-by-step through the process of how to make a box.
So, whether you’re looking to put a personal touch on favour boxes for a wedding or a special occasion, or just want to make your presents extra special – read on and you’ll be a pro in no time!
What types of box can I make?
The possibilities are endless, there are sets out there to make boxes in just about any shape or size imaginable!
In this post we’re going to be taking a look at a number of ranges from Gemini which will take you through a few different box making techniques. And there’s plenty of opportunity to embellish and decorate as well, so whether you’re a beginner or a bit of an expert, we’re sure there’ll be something here to take your eye!
So, today we’re showing you how to make:
- Gemini Dimensionals Favour Box Dies and Stencils
- Gemini Dimensionals Picnic Box & Milk Carton Dies
- Gemini Pop Up Box Stamp & Dies

Gemini Dimensionals Favour Box Dies and Stencils
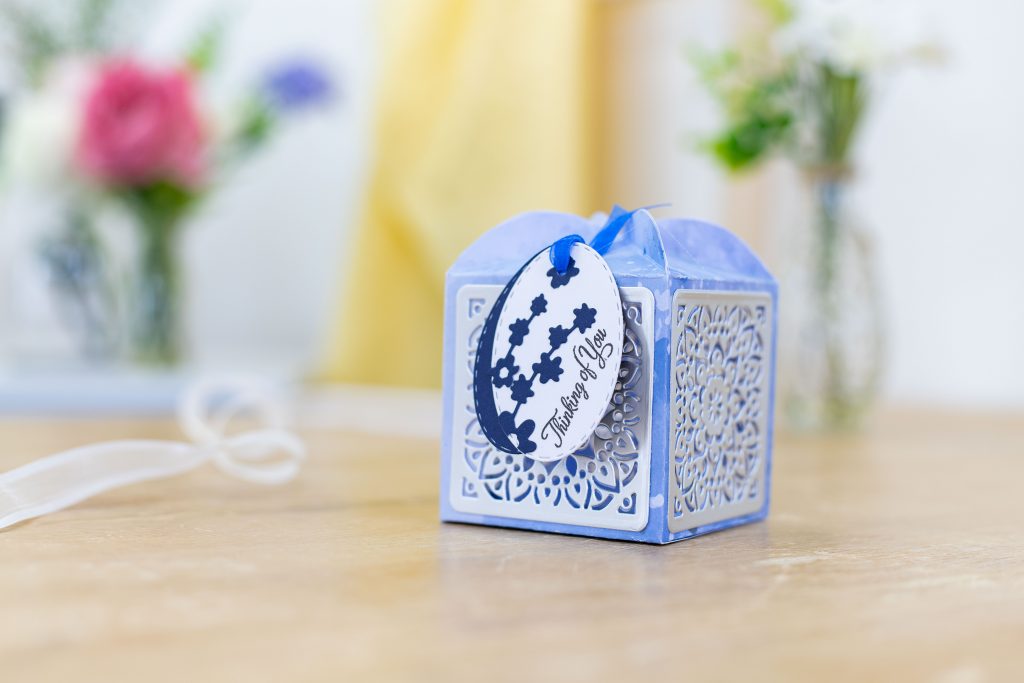
These dinky boxes are ideal to use as wedding favour boxes, party treats or just to pop a little gift inside!
This range is a really good way for beginner crafters to get started in box making- and the versatility of each set means that more experienced crafters can explore and experiment with different effects as well!
Each set includes a stencil to draw around, cut out and build your box – no die-cutting required! Also included are a set of beautiful dies to decorate the side panels with gorgeous cut-out designs. But if you don’t have a die-cutting machine yet don’t worry, you can decorate the sides of your box with stencilled, stamped or coloured designs!
You can choose from the following Gemini Dimensionals Favour Boxes:
- Origami Favour Box – with a folded-in opening
- Ornate Favour Box – with a four corner opening
- Happy Heart Favour Box – with a heart-shaped opening
- Country Cottage Favour Box – with a roof-style opening
- Locking Heart Favour Box – with a mechanism that creates a heart shape when closed
- Handled Favour Box – complete with a carry handle
Each comes with a set of dies to create a different stunning design, and the range has been sized so you can mix and match boxes and die-cut decorations!

How to make a Gemini Dimensionals Favour Box
If you’re a first time box maker this is the perfect collection to start with, so let’s get cracking!
- Choose your favour box stencil and cardstock – we recommend using card weight of 250gsm upwards
- Place your stencil on top of the cardstock and lightly draw around the outer edge with a pencil
- Now trace the inner lines with a pencil – these will be your score lines
- Take off the stencil and carefully cut out your box shape
- Score using your pencil score lines as a guide, use a ruler for diagonal lines if you like
- Fold your box, using a Bone Folder tool to burnish the folds
- Now it’s time to consider your decoration, the dies included in the set can cut a design directly into the side panels (perfect for tealights!) or you can cut onto a second piece of cardstock in a complementary shade
- Choose your decorative dies for the side panels, create your plate combination using the helpful Sandwich Guide in the instruction manual and run through your die-cutting machine
- Lay your box template flat and affix your die-cut decoration to the side panels – for best results we advise using Collall All Purpose Glue with a Fine Tip Applicator or a Crafter’s Companion Glue Tape Pen (dots)
- Now it’s time to build the box – fold the side panels and stick the two tabs together with Collall All Purpose Glue, Red Liner Tape, or Crafter’s Companion Permanent Glue Tape Pen
- Do the same with the bottom tabs before sticking the bottom panel down
- Fold up your locking or closing mechanism
- Pop on any extra stick-on pearls, gems or ribbons for a final flourish and you’re done!

Gemini Dimensionals Picnic Box & Milk Carton Die Sets
These sets create absolutely adorable boxes with so much personality! Each set creates a box shaped like a cute little house, complete with windows, doors and a roof – the Picnic Box set comes with a sweet handle and the Milk Carton set is taller.
And, to make these boxes even more fun there is a whole range of corresponding stamp & die sets to add oodles of themed detail and decoration! There’s a box for every occasion with this collection – take a look below!

How to make a Gemini Dimensionals Milk Carton or Picnic Box
- Die-cut the main die from the set twice, using a die-cutting machine and the plate combination included in the instructions manual
- Score and fold all of the score lines
- Colour your die-cut box pieces using Spectrum Noir Markers or Inkpads
- Stamp and die-cut your chosen die-cut embellishments before colouring and affixing to the outside of your die-cut box pieces
- Fold together and assemble one of your die-cut box pieces and glue the triangle-shaped section of the side panel inside the base of the main panel
- Repeat the previous step with the second die-cut box piece
- Join the two box pieces together by gluing the base of one piece inside the base of the other
- Apply glue to the side tabs and glue them inside the panels
- Close the top of the box – either with glue, or you can punch a hole into the top of the handle and secure with ribbon or twine

Gemini Pop Up Box Stamp and Dies
If you’re up for a tiny bit more of a challenge then we promise the Gemini Pop Up Box range of Stamp & Die sets are totally worth it!
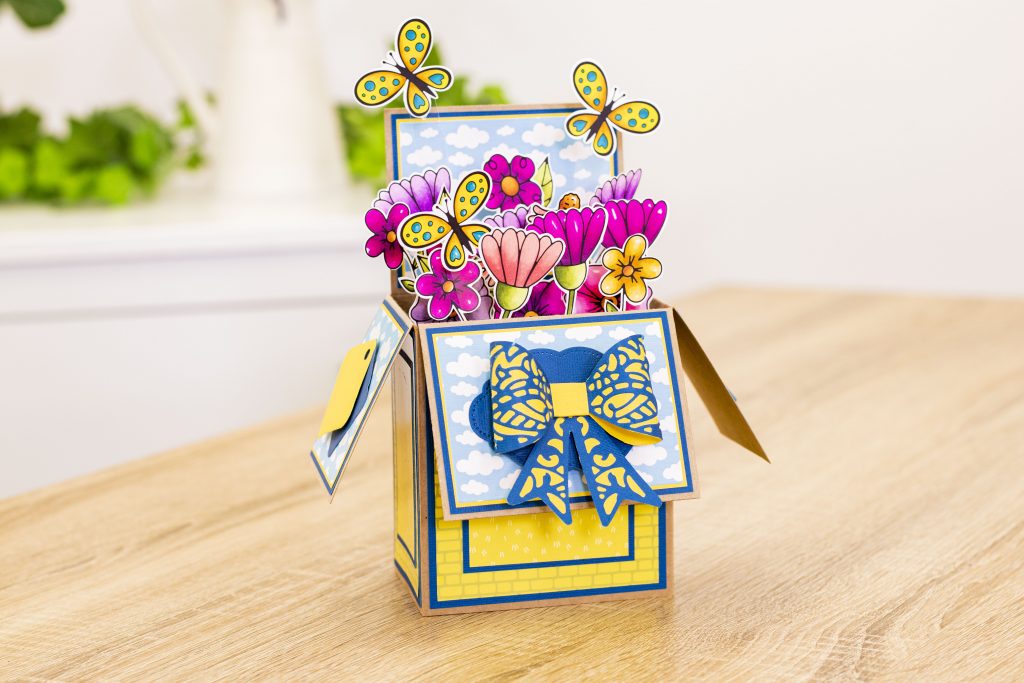
As the name would suggest, these boxes pop open with fun details and embellishments designed to bring a smile to the face of any recipient! These clever boxes fold flat so they can be slotted inside an envelope, so the pop-out element comes as a real surprise!
You will need the Pop Up Box Card Die to create the base for your pop-up elements – and there’s a whole host of Stamp & Die sets to decorate your pop-up box for any occasion.
- Vintage Tea Party
- Once Upon a Time
- Ocean Paradise
- I Believe in Fairies
- Happy Birthday
- Floral Boutique
How to make a Gemini Pop-Up Box
Simply follow this step-by-step to build your box card base or click here to download some instructions with added images for extra help!
- Place a piece of A4 card in front of you and attach the large die from the Pop Up Box Card base set with low tack tape. Run this through your die-cutting machine. Repeat this with another piece of card, giving you two separate cuts. Please note: there is no bottom cutting edge to this die, but don’t remove the cut yet!
- You will notice that the die has created partial cutting lines down the sides of your card. Use a guillotine or a craft knife and ruler to continue these cut lines straight down the lengths of your card pieces to remove them.
- You will notice that there is a score line down one side of the card and one in the centre, and these will create the corners of the box. Score and fold these lines on both boxes.
- On a new piece of card, use the smaller die to cut three inserts for the inside of the box. Fold the tabs on each insert inwards.
- Look at the box piece and you will notice that there are three score lines. These score lines are to be used with the inserts that you created in the previous step. Line up the first insert with the far-left score line. Attach adhesive to the underside of the tab and fix into place. Repeat the step for the remaining inserts.
- Apply adhesive to the long tab on the second piece of card and attach the two pieces together.
- Fold all of the inserts inwards. Apply adhesive to the tab on each of the inserts and also down the long tab on the right hand side of the box.
- Fold the box using the score line that runs down the centre by folding in half – the adhesive on the tabs of the inserts will attach to the inside of the box. Fold the long side side tab around the box and press down to ensure it sticks. Press along the outer surface to ensure that the tabs inside are also adhered.
- If you have used wet glue, allow the glue to dry completely before proceeding to the next stage. If you have used tape, you can open the box out straight away.
- Decorate the box as desired and create and colour pop up elements from your chosen stamp and die sets. Attach them to your box with strips of acetate.

If this post has got you thinking about exploring box making, why not tune into the below episode of The Craft Class on Crafter’s TV to find out even more about Gemini Dimensionals and how to create amazing gift and favour boxes!
For a warm welcome to all sorts of craft techniques, join us for more episodes of The Craft Class on Crafter’s TV to unlock your creative potential!
We hope this post has helped you get started with box making, we’d love to see your sweet gift boxes on social media. Share your photos with us on Facebook, Twitter or Instagram using the hashtag #crafterscompanion.
