How to make a Z fold card
- Read time: 5 minutes
- Written by: Crafters
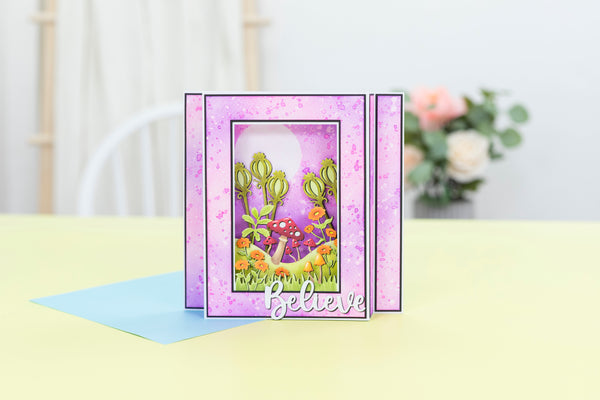
To add some extra dimension to your hand made cards, why not try a Z Fold card? This card shape offers so many options for decoration and customisation. And it’s so simple to master!
Just follow our step-by-step guide to craft your own Z Fold card, ready to be decorated to match your craft style or occasion!
To help you get started, we’ve also added instructions to create an elegant card that blooms with natural beauty. We’ve used the Sara Signature Say it with Flowers range, which includes botanical patterned papers, sets to create craft flowers and delicate dies for a range of occasions.

You will need:
- Sara Signature Say it With Flowers:
- Centura Pearl Snow White Hint of Gold A3 Card
- Crafter’s Companion Stamens – Metallics
- Crafter’s Companion Flower Forming Foam Moulding Ball Tools
- Spectrum Noir Harmony Quick Dry Dye Inkpad – Fuchsia
- Collall All-Purpose Glue
- Collall Tacky Glue
- Foam Pads (3mm depth)
- Hot Glue Gun
- Die-cutting Machine
- Guillotine
- Score board and scoring tool
Step-by-step instructions:
How to build a Z Fold card base
- Cut a piece of Centura Pearl card to 15″ x 7 1/2″. Score at 3 3/4″ and at 7 1/2″ to create a fold-back shape as shown.
- Next, cut a second piece of Centura Pearl card to 15″ x 2 1/2″. Score at 3 3/4″ and at 7 1/2″ to form the Z Fold panel for the card base as shown.

How to add mats and layers
- To add colour to the card base and Z Fold panel, we’re going to create mats, these are pieces of patterned paper or card, each cut 1/4″ smaller than the last and layered up to create a stepped effect.
- For back panel of the fold back card base cut out:
- 7 1/4″ x 7 1/4″ in pink card
- 7″ x 7″ in gold card
- 6 3/4″ x 6 3/4″ in patterned paper
- For the front panel of the fold back card base cut out:
- 3 1/2″ x 7 1/4″ in pink card
- 3 1/4″ x 7″ in gold card
- 3″ x 6 3/4″ in patterned paper
- For the front of the Z fold section cut out:
- 2 1/4″ x 7 1/4″ in pink card
- 2″ x 7″ in gold card
- 1 3/4″ x 6 3/4″ in patterned paper
- For the two inner sections of the Z fold section cut out two each of the following:
- 2 1/4″ x 3 1/2″ in pink card
- 2″ x 3 1/4″ in gold card
- 1 3/4″ x 3″ in patterned paper
- Layer up and attach each set together before glueing to the correct panels of the fold back card base and Z fold section as shown.

Adding die-cut decorations
- Cut out the outline shape piece from the Dearest Friend die set from Centura Pearl card.
- Die cut the detailed sentiment piece from the Dearest Friends die set from gold card, die cut a second time from pink card.
- Snip the ‘Dearest friend’ sentiment from your pink die cut piece and layer it over the gold piece. Arrange both onto the outline shape and glue together.
- Use foam pads to attach to the Z Fold panel of your card.
- Die cut the Intricate Arc die using Centura Pearl card. Die cut two more pieces, one from gold card and one from pink card.
- Snip the pink Intricate Arc piece to take out the outer piece of the arc and attach onto the Centura Pearl Piece. Layer this piece onto the gold arc, offsetting it slightly to create a drop shadow effect.
- Use foam pads to attach to the front panel of the card base.

Adding craft flower decorations
- Die cut two pieces of the largest flower shape from the Beautiful Peony die set using Flower Forming Foam. Repeat to cut out three of the medium sized flower shapes and two of the smallest flower shapes.
- Heat each piece using a heat gun or iron then use a ball tool to mould them into realistic petal shapes.
- Layer up your shaped petals to create two flowers, poke a hole through the centre of each and thread a few stamens through.
- Use a glue gun to attach the flowers to your card as beautiful, 3D decoration.
- Die cut leaf and foliage sets using green flower forming foam and glue underneath each flower shape.
- Tie a small bow from organza ribbon and attach to the bottom corner as a final flourish.

We can’t wait to see your finished makes! So, don’t forget to show us your creations on Facebook UK, Facebook USA, Twitter, Instagram UK, Instagram US, Pinterest UK or Pinterest US using the hashtag #crafterscompanion
